 To go immediately
to a step, click any of the links below.
To go immediately
to a step, click any of the links below.For an overview that includes definitions of key terms, examples, and an organizational diagram of Users and Employees, see Admin Module Overview.
Instructions for the Master User List are shown in the following table:
 To go immediately
to a step, click any of the links below.
| For these instructions | Review these steps |
| To filter your view to active, inactive, or deleted | 1 |
| To create a new User | 2-9 |
| To search for an existing User | 10 |
| To deactivate a user | 11 |
| To edit a User record | 12-14 |
| To delete a User record | 15-16 |
 Deleted Users are listed for convenience,
but cannot be used.
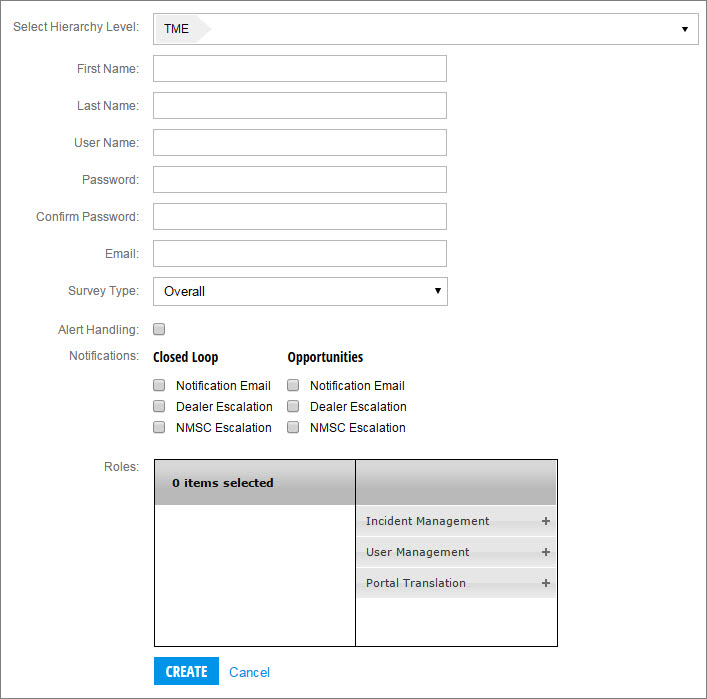
At Select Hierarchy Level, select the User's current hierarchy level.
Enter information into the next six fields.
At Survey Type click the down arrow to select a survey type.
At
Alert Handling, to include
the user in Alert handling, select the checkbox.
 Selecting
this checkbox allows the User to edit Alerts from the Customer History
report page.
At Notifications, select the relevant notifications checkboxes for the User.
At
Roles, to select a role, from
the column on the right, click the + sign for the role you want to
assign to the User.
The role you clicked moves to the column on the left.
Click
Create.
The new User is now listed in the Master User List.
To search for an existing
User, in the search box, enter the first, last, or User name,
organization name, or email address, then click ![]() .
.
To deactivate a user, click Edit to the left of the user's name.
For immediate deactivation, unclick the Active
box. Click Update to save
this change.
 The
system will allow a user deactivation as long as the user is not linked
to Open Closed Loops or Opportunities. If either are open, the system
will display a pop-up with a link to access the relevant Closed Loop/Opportunity
list. Define a new assignee from this area and you will be able to
then proceed with the user deactivation.
To
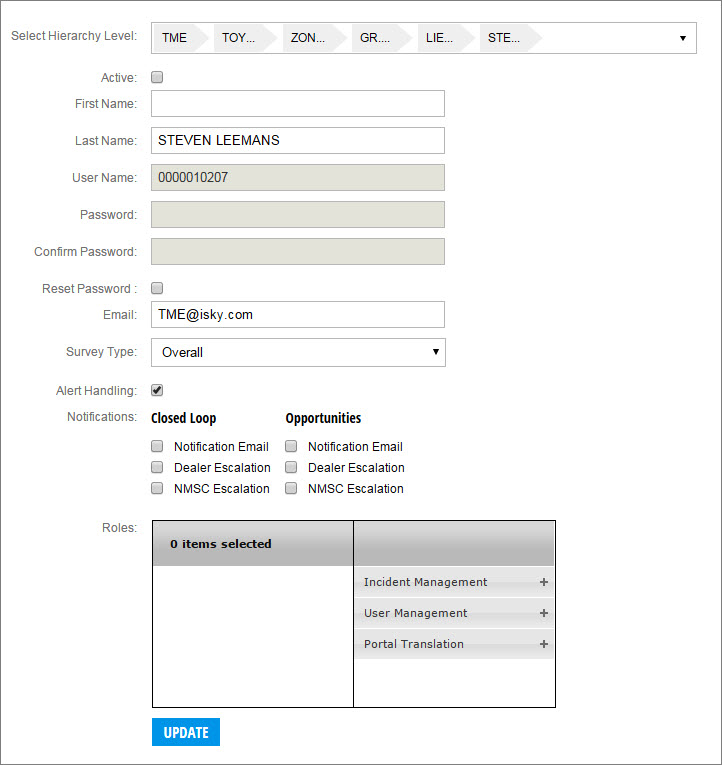
edit a User record, search for the User record, and then at the
end of the row, click Edit.
The Edit User page opens.


See also:
Working with the Auto-Created Employee User List
Working with the Employee List